
Pencil sketching!!
Most of you wanted to know how I do pencil sketching and which colors I use and whats my technique..!! So, here in this post I will be sharing the steps to sketch a beautiful flower with every step involved. My favorite pencil colors are Staedtler ones and crayola by Funskool 😀
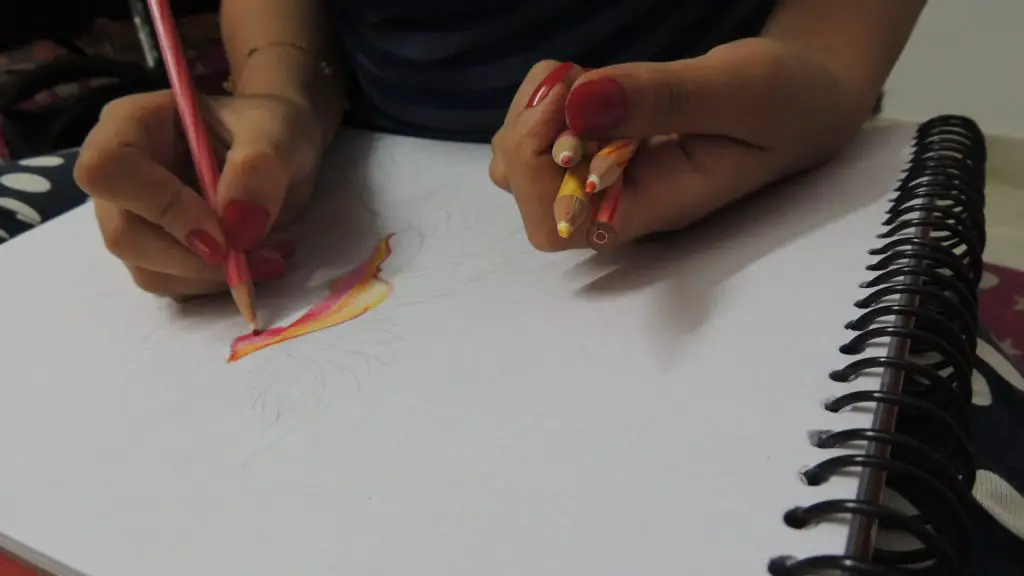
The very first thing while making a drawing is to pick the pencils which you will be using ,it must be sharped properly and also your hand should work on very lightly.. <3 (I use Camlin supreme drawing pencils :P) so that if you have to rub a part of it, it will not leave an impression on the sheet. Try to use thick drawing sheet which has a texture at the back and smooth front!!
First always try to make a rough drawing so that alterations can be done when you are doing the shading or while final touch.


Now choose a part you want to get started with. I always start with outer boundary.
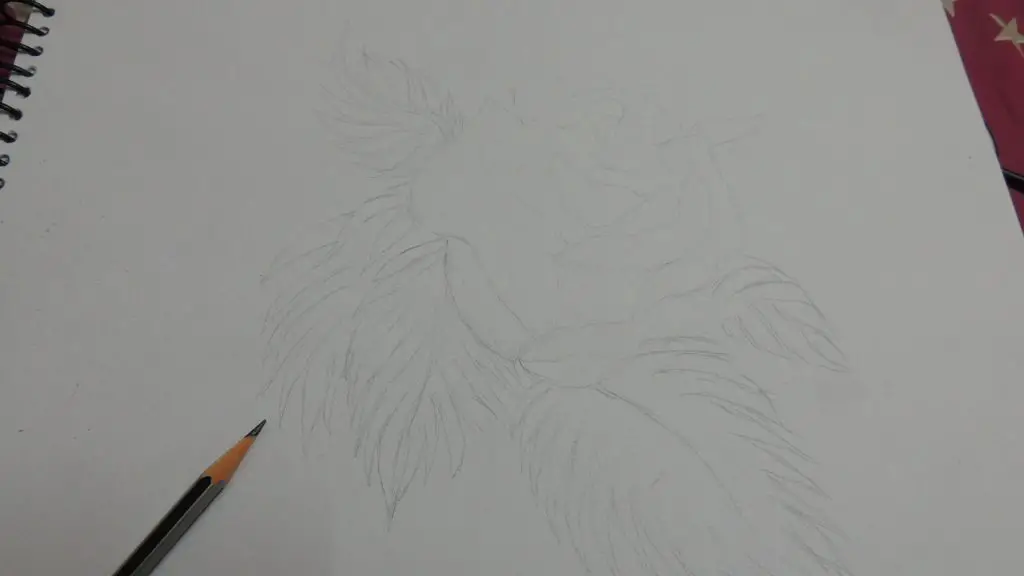
In the case of this flower, the most important thing should be the outline of the flower, It should also comprise of different shades.
Always hold the different shades of color in one hand and then start doing!! It will give you some positive vibes seeing soo many shades ( I get :P)
So lets get started with second step of coloring!! EXCITED!!
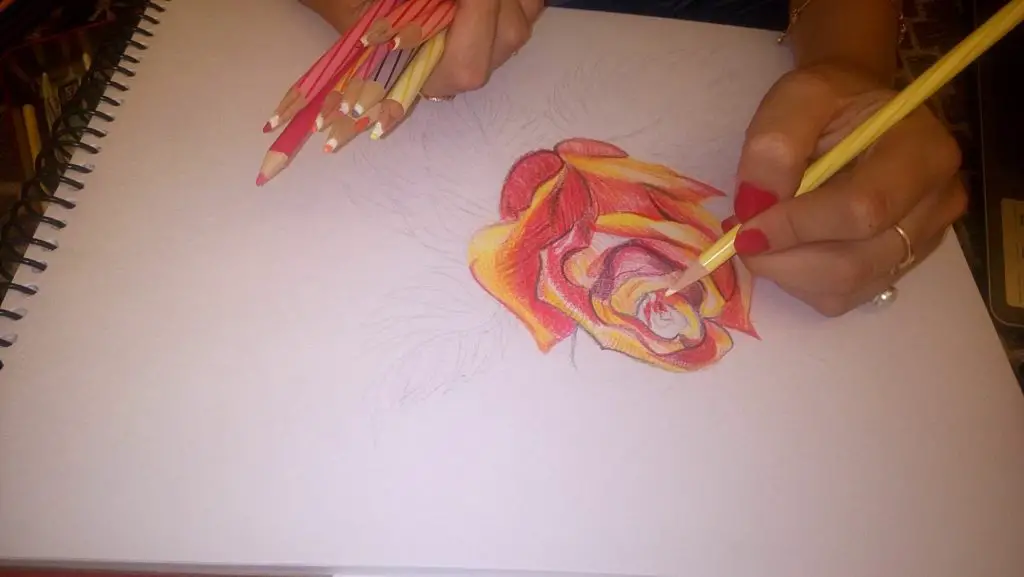
A red color outline and then started shading with yellow color and shades of red. The pencil should work on dark at the corner and while going on in between, light shades should be there so that mixing can be done properly!! In shading the second color should overlap the first color so that the perfect shade can be obtained.
Quick tip: For shading your pencil should not be sharped, because blunt gives the best effect!! (My tip)
Step by step coloring I’ll be showing here!! Let’s have a look 🙂
Step 2
Here the outline is clearly visible and the overlapping of yellow and red shades also.
Step 3
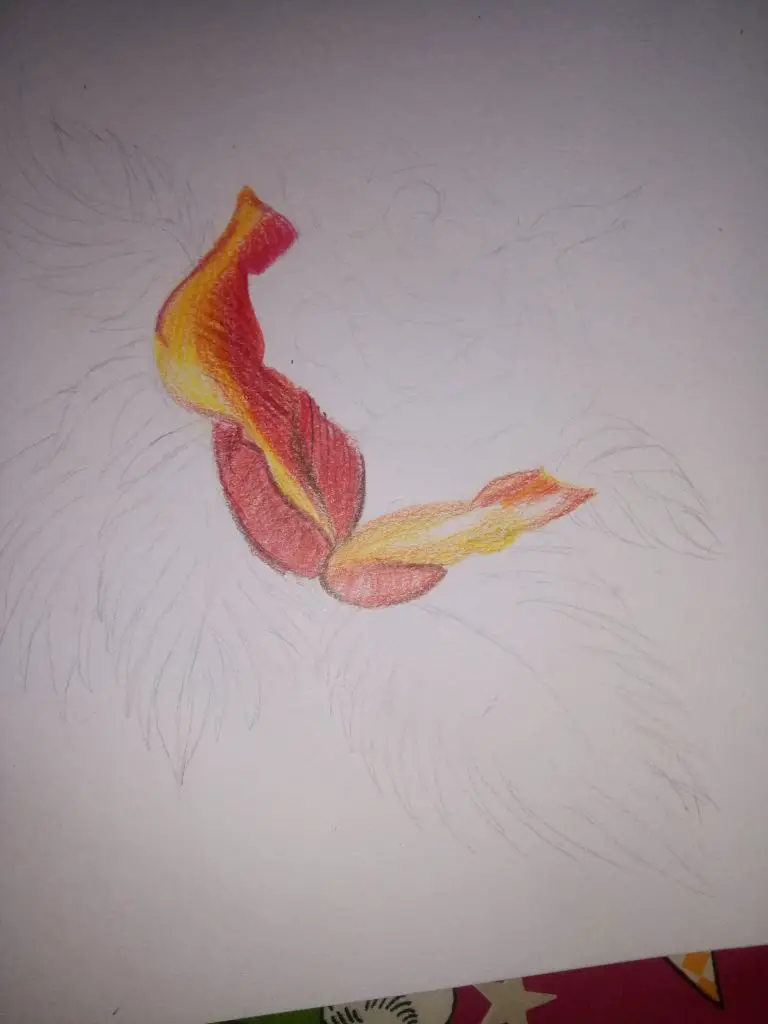
In this pic the shades are completely visible. To give a petal effect, some lines also are made which can be properly seen in the above pic. These lines are given at the end when you get completely satisfied with the shades.
Step 4
It is not necessary to only use red and yellow, I have given deep brown outline to reveal the originality of flower.
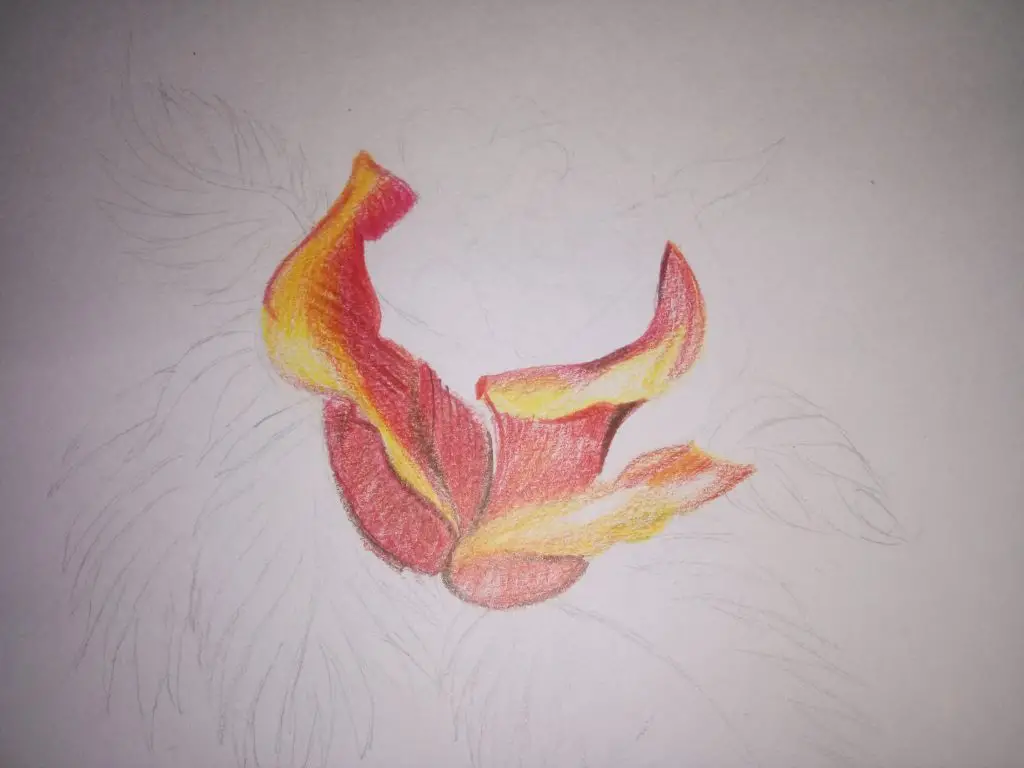
Step 5
Towards the completion of the flower!! The shades should be in proper direction so that the originality of flower doesn’t go away.
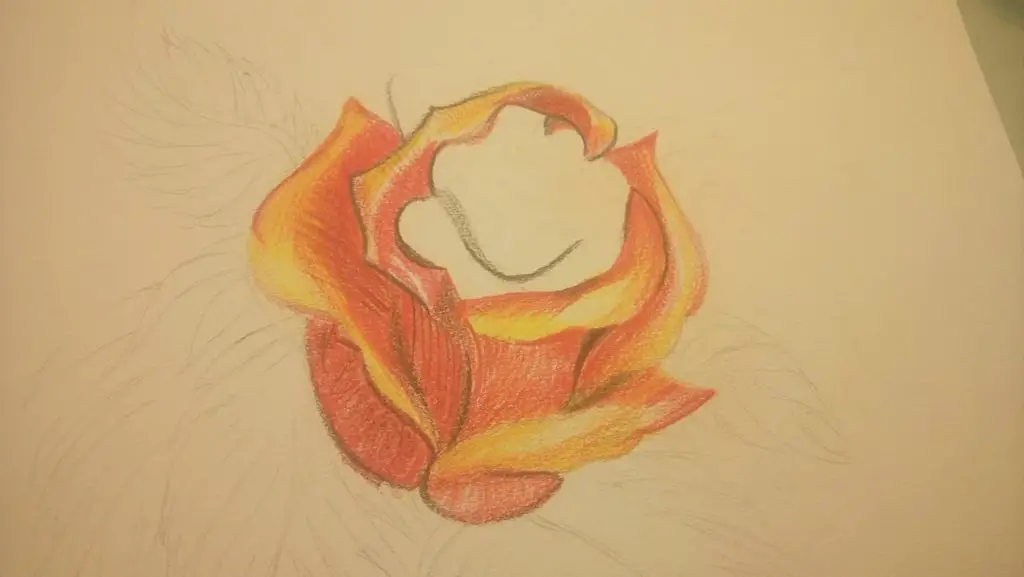
Step 6
Now this flower is almost complete.. shades towards the inner side are being done.
Time to look for complete flower <3 EXCITED!! You will feel even more excited when you will trying this yourself.. Being an artist that happiness can’t be described.
Step 8-Complete Flower

The shades and the stroke of the pencil is clearly visible here!! Now Its time to complete the leaves because every flower is incomplete without the leaves.
Step 9

Started with the outline of leaf.. different shades which I have used here are clearly visible.. I have used all different shades of green, yellowish look and a bit of blue color for mixing purpose!!
Step 10

Now I just used the required colors to give a leafy look and the outline took all the credit 😛 so you might now know the importance of shading effects given to outline.
Step 11

Again the same basic rule is followed up!! Outline with shades. Here I have used blue shade in between to give a deep effect in leaves.Once completed then only difference can be seen.
Step 12

I just added some more colors and because my outline was perfect, wasn’t a need to do more!!
Step 13

Now we will be moving towards the completion of the flower.. this small leaf can also be done in the same way..
Complete flower <3

This is how the flower looks upon completion!!
I hope my steps were clear and understandable.. 🙂
Well, I have some cool posts scheduled for the upcoming weeks !! just a hint, if you are a shopping freak like me, then you will surely gonna love it 😉
Sketching Techniques: Adding Depth and Refinement to Your Artwork
Sketching is a versatile and portable art form that allows artists to express their creativity. With pencil sketching different techniques can be used to add depth and refinement to your artwork.
One important technique is layering which involves creating depth and shadow by adding multiple layers of pencil strokes. This technique allows you to build up the values and create a realistic representation of your subject.
Another technique is underdrawing which is the first layer of your artwork. This layer serves as a foundation and helps guide your subsequent shading and detailing.
Shading techniques such as hatching cross-hatching stippling tonal sketching and scumbling are also commonly used in pencil sketching. These techniques allow you to create texture shadows and highlights in your artwork.
Loose sketching is a relaxed and effortless style that gives your artwork a more organic and free-flowing feel. This technique is great for capturing movement and expressing your artistic style.
Gesture drawing is another technique that focuses on capturing the movement and pose of your subject. It requires quick and spontaneous sketches that convey the essence of the subject.
Blending drawing techniques such as graphite charcoal and oil pencil blending can be used to create smooth transitions and gradients in your artwork. These techniques are great for creating a more polished and refined look.
Erase lines can be used to create white highlights in your artwork. By selectively removing pigment or shading you can create areas of contrast and bring attention to certain parts of your drawing.
Other techniques such as frottage indenting contour line drawing cross-contour line drawing continuous line drawing and detail work can also be employed to add interest and complexity to your sketches.
Having a variety of drawing supplies including pencils sharpeners erasers paper sketchbooks and paper blending stumps is essential for exploring and experimenting with these different techniques.
By incorporating these techniques into your pencil sketching you can take your artwork to the next level and create stunning and visually appealing pieces. Remember to practice regularly and have fun exploring the possibilities of pencil sketching!